Add your first Squarespace website
Once you've created your Bridge account, the next step is to add your first Squarespace client website. Bridge makes it easy to connect your Squarespace sites and start managing client communications.
Method 1: Connect with Squarespace (Recommended)
The easiest way to add a Squarespace website is by connecting your Squarespace account, which verifies your site and makes setup easier.
- Log in to your Bridge dashboard
- Click the "Add Website" button
- Click the "Connect Squarespace Site" button
- You'll be redirected to Squarespace to authorize Bridge
- Select the Squarespace site you want to connect
- Grant Bridge the necessary permissions
- You'll be redirected back to Bridge, and your site will be automatically added and configured
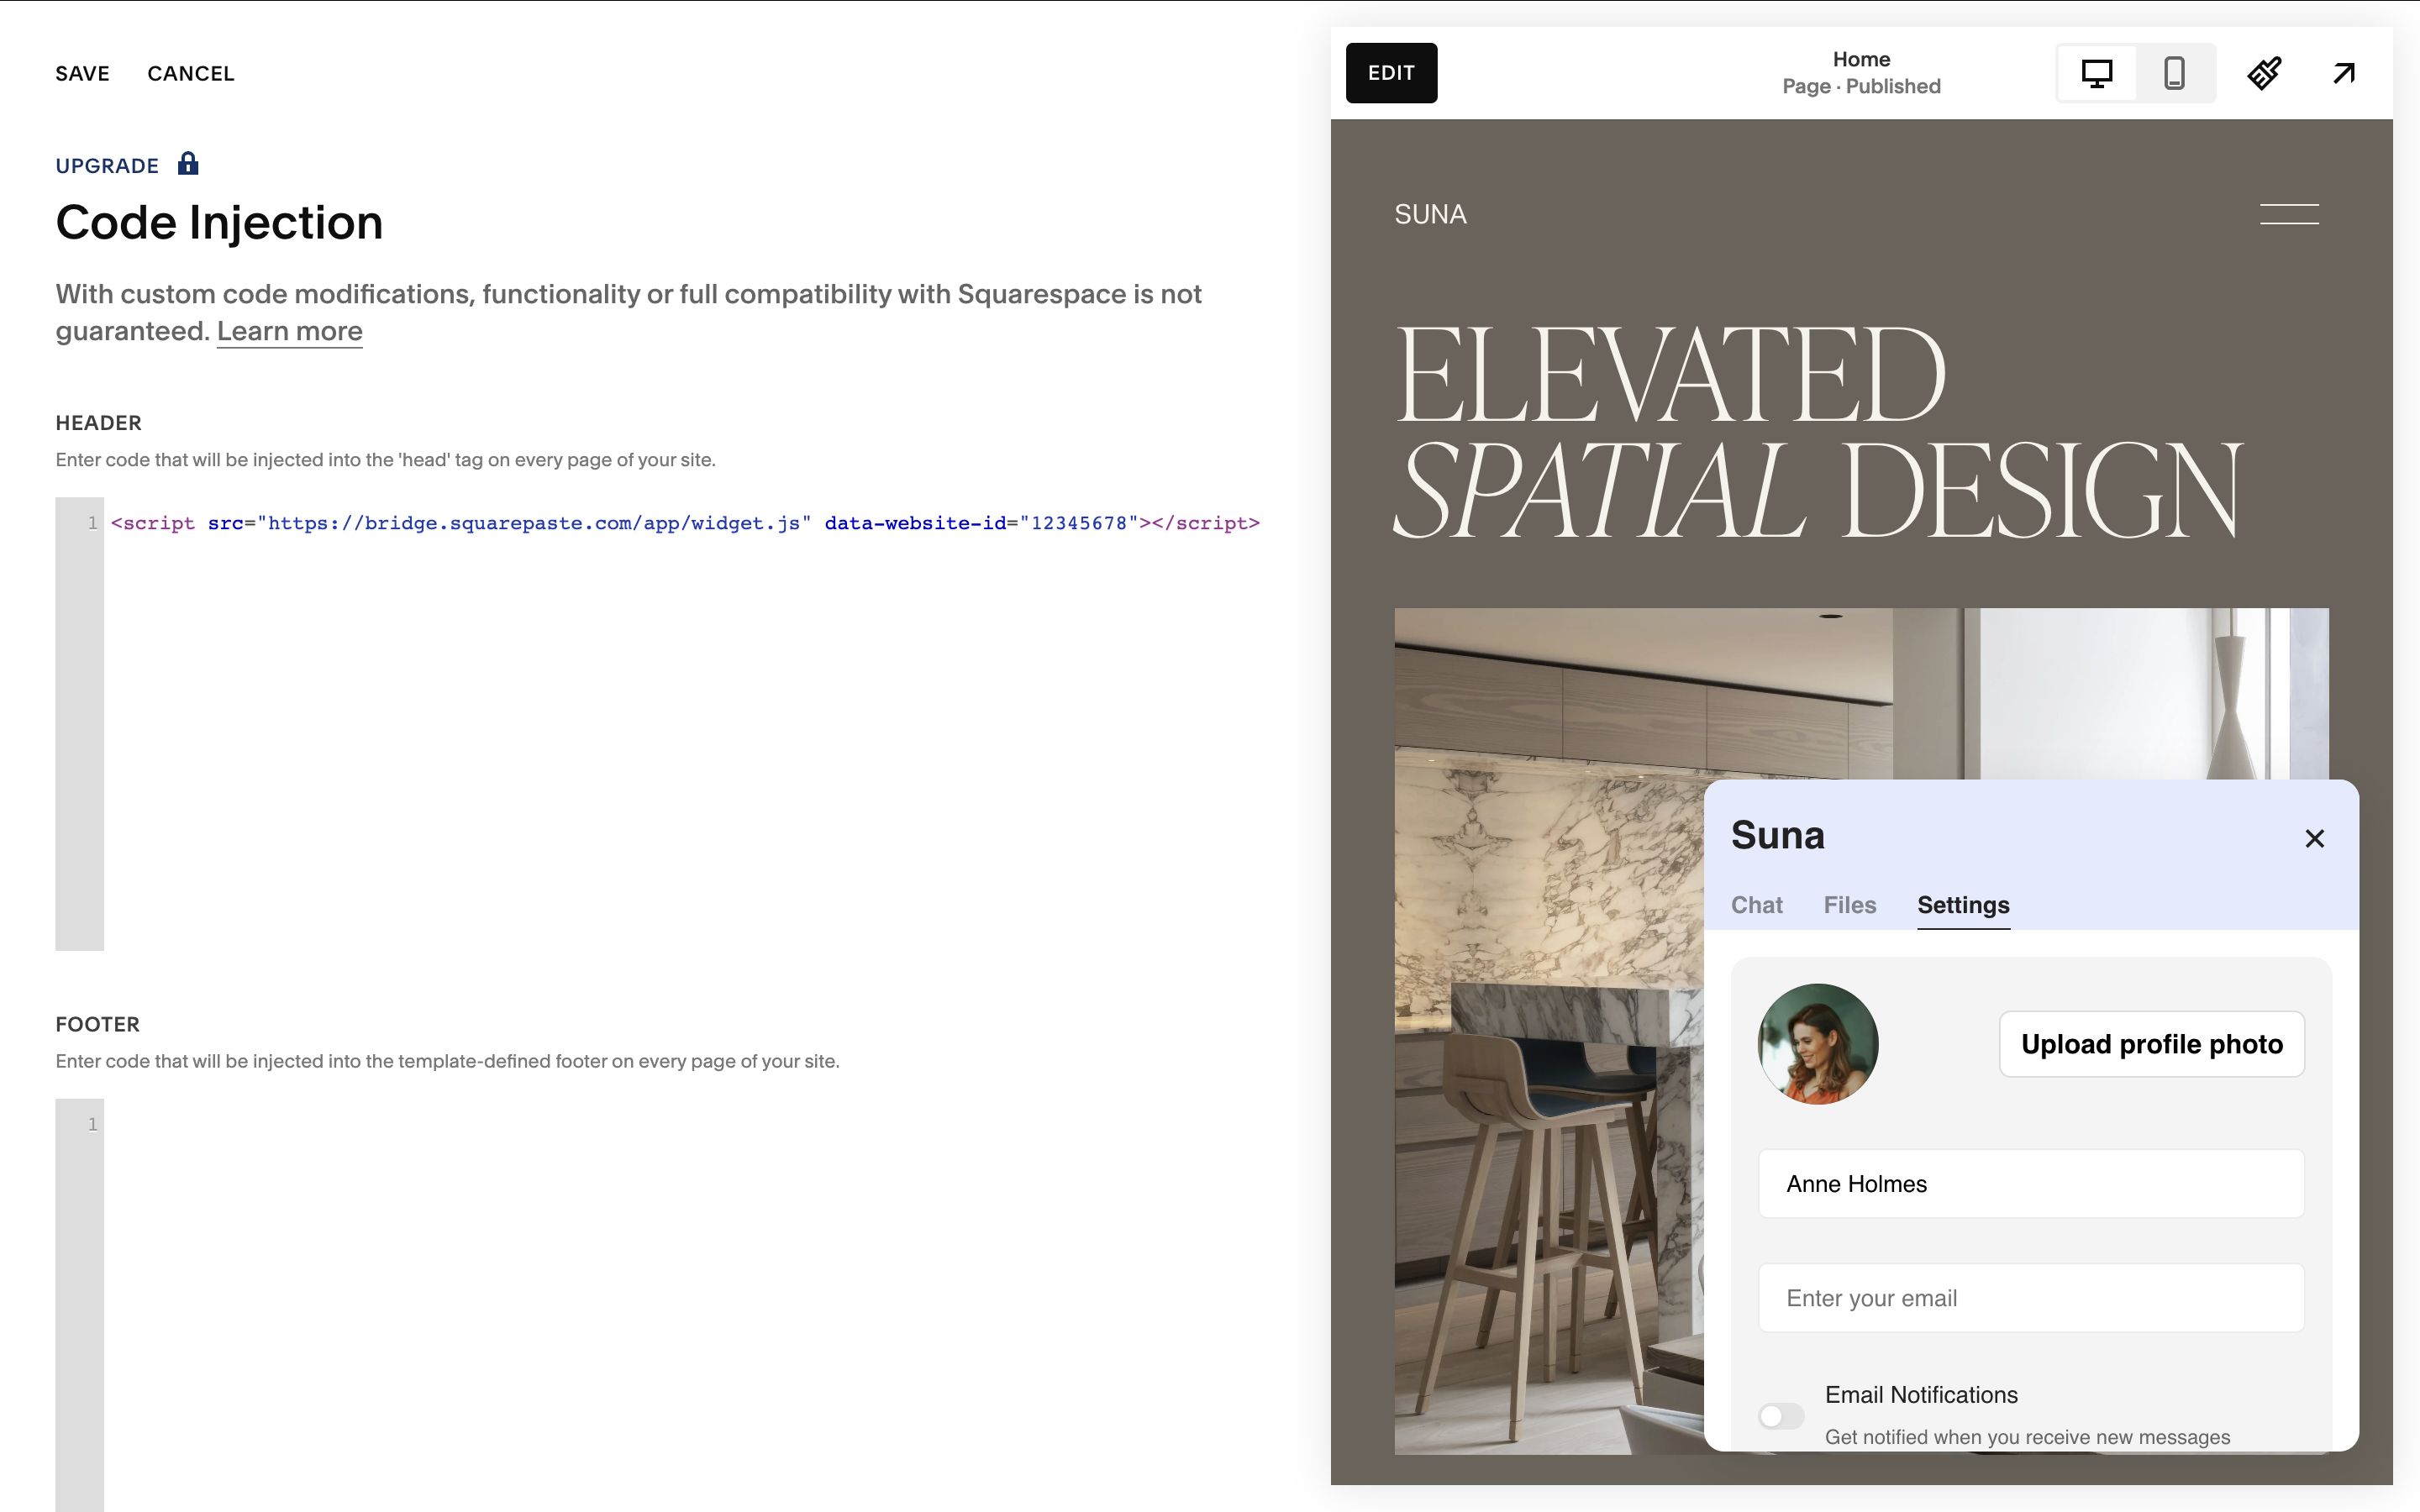
After connecting, you'll need to install the widget code on your Squarespace site. You can find the widget code in your Bridge dashboard on the website's detail page. Copy the code and add it to your Squarespace site using Code Injection (Settings → Advanced → Code Injection → Header).

Method 2: Manual Entry
You can also add a Squarespace website manually by entering the details yourself.
- Log in to your Bridge dashboard
- Click the "Add Website" button
- Enter a name for the website (e.g., "Client Name - Portfolio Site")
- Enter the Squarespace domain (e.g., "yoursite.squarespace.com")
- Optionally set a passcode for additional security
- Click "Add Website" to create the entry
- After creation, you'll receive a widget code that you'll need to install on your Squarespace site
Plan Limits
Keep in mind that your plan determines how many Squarespace websites you can add:
- Link Plan: 1 Squarespace website
- Connect Plan: Up to 3 Squarespace websites
- Atlas Plan: Unlimited Squarespace websites
If you've reached your plan's limit, you'll need to upgrade to add more Squarespace sites.
What's Next?
After adding your Squarespace website:
- Install the widget code on your Squarespace site using Code Injection (Settings → Advanced → Code Injection → Header)
- Copy the widget code from your Bridge dashboard (found on the website's detail page)
- Paste the code into the Header section of Code Injection and save
- Customize your widget settings to match your brand
- Start chatting with clients through the Bridge widget
Tip: Connecting with Squarespace is an easier way to add your site to your dashboard. After connecting, add the widget code to your Squarespace site's Header Code Injection.